-

Free Power BI Template: Connect to Multiple Files in Local Folder in Power BI Become more efficient at connection to...
-
Free Power BI Template: Connect to Multiple Files in Local Folder in Power BI Become...


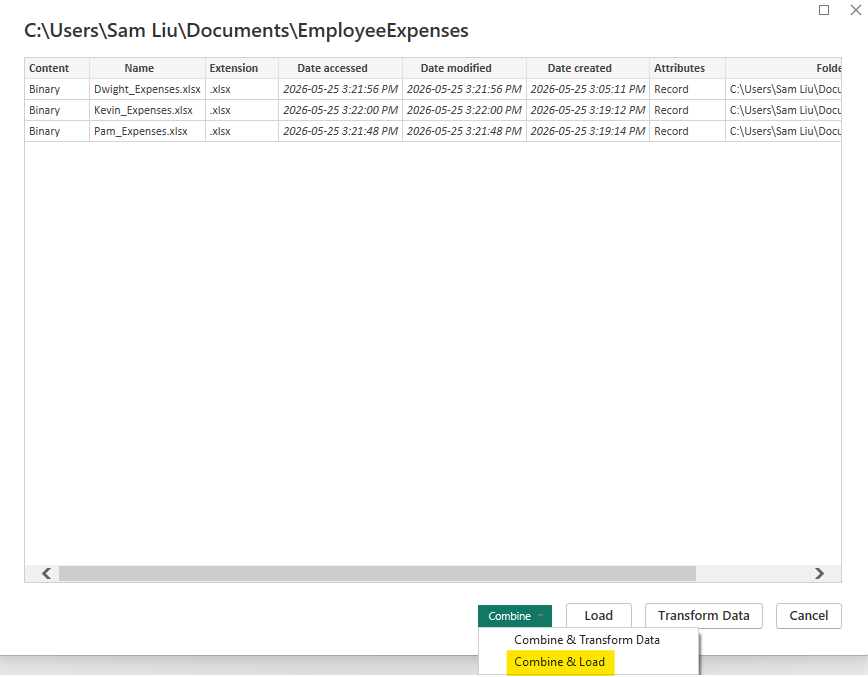
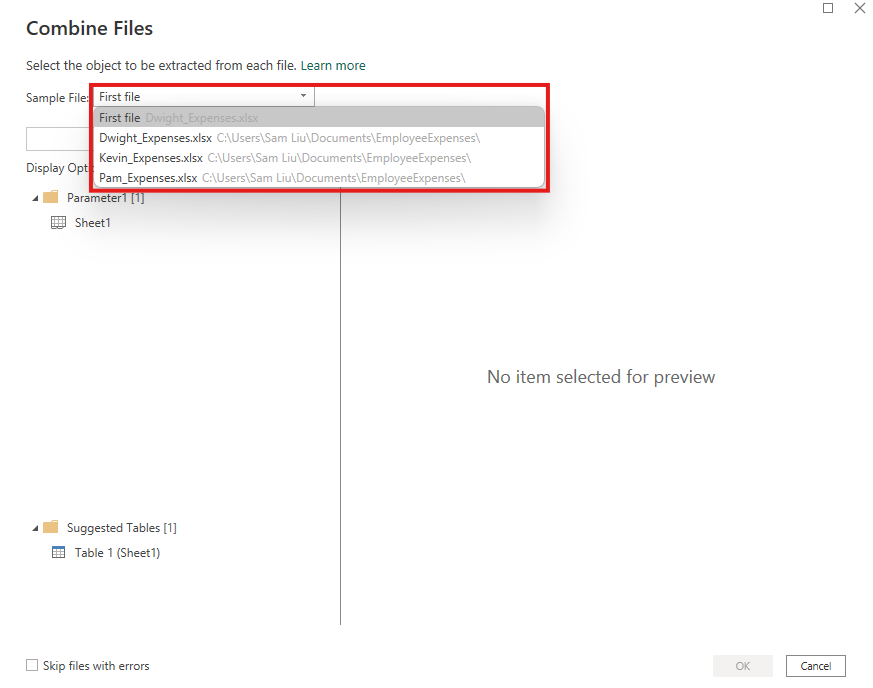
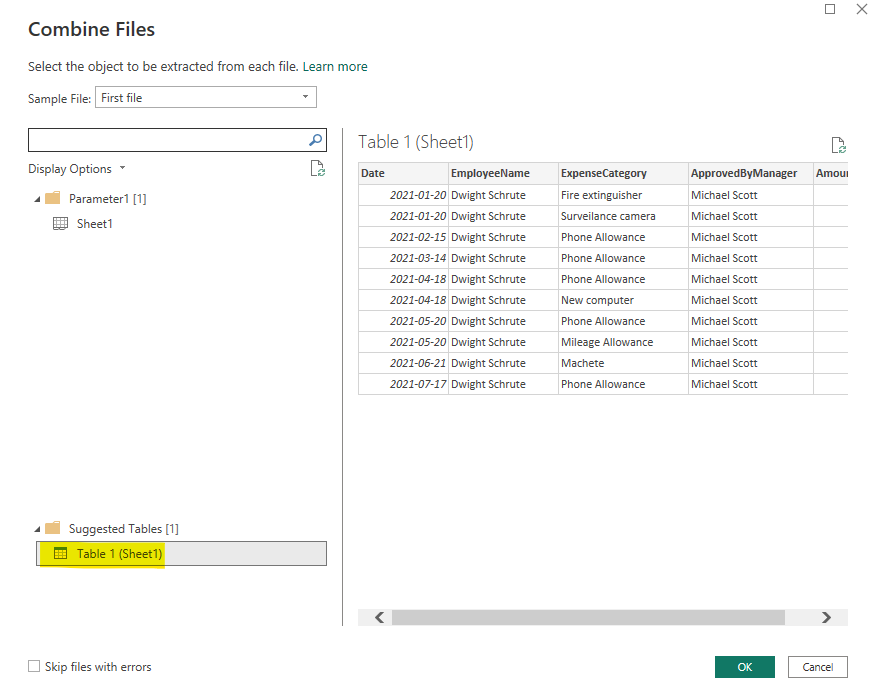


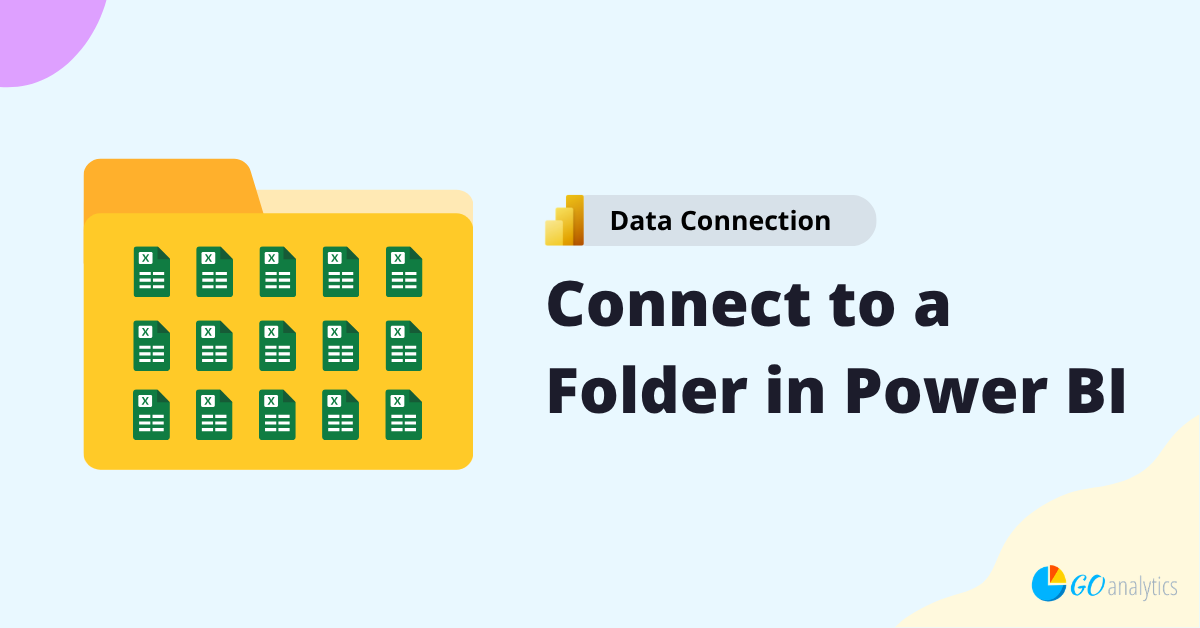
Free Power BI Template: Connect to Multiple Files in Local Folder in Power BI Become more efficient at connection to...
Free Power BI Template: Connect to Multiple Files in Local Folder in Power BI Become...
![Read more about the article [How To] Import data from PDF into Power BI](https://goanalyticsbi.com/wp-content/uploads/2022/12/Import-From-PDF-300x157.png)
![Read more about the article [How To] Import Data from Google Analytics into Power BI](https://goanalyticsbi.com/wp-content/uploads/2023/01/Blog-Feature-Image-Connect-to-Google-Analytics-300x157.png)
![Read more about the article [How To] Append Queries in Power Query (Power BI & Excel)](https://goanalyticsbi.com/wp-content/uploads/2023/10/Appending-Queries-300x157.png)